You can read my short guest post on contentment over at Scout's blog here!
Monday, October 8, 2012
Tuesday, October 2, 2012
Easy Fried Egg Sandwiches with Radicchio
Sometimes dinnertime sneaks up on me.
Especially when we have a late lunch, like today!
(We went to Umami Burgur in Studio City. I wish I had taken a picture! I dug both my truffle burger and the swan taxidermy on the wall.)
So here's one of my favorite meals to fix on the quick!
You'll need:
-Eggs
-Bacon
-Radicchio, or another bitter lettuce
-French or sourdough bread
-Grainy or Dijon mustard
-Red wine Vinegar
-Olive Oil
-Butter

Begin by slapping a few slabs of bacon in a pan over medium. Being a bacon lover, I wish I had made a few more slices!

Begin to prep your Radicchio - slice it and remove to a bowl.

Make a simple vinaigrette by whisking together equal parts of olive oil and red wine vinager with about a tablespoon of grainy mustard (or dijon). Season with pepper.

Pour over the radicchio and toss to coat. The bitter lettuce and bright vinaigrette really cut through the salty bacony eggy part in a beautiful way.

Butter the tops of the bread slices and toast under the broiler until golden.

Once the bacon is crisp, remove to a paper towel and crack your eggs into the grease, seasoning with salt and pepper.

Don't forget to take your bread out! I've burnt alot of bread this way...

When the eggs are done, layer them on the non-toasted side of the bread with the bacon and radicchio.

Yum! Cheese is also an option. I meant to put a slice of aged swiss on top of the bacon, but I forgot until the sandwiches were already built. Whoops!
Thursday, September 20, 2012
Early morning playlist.
Inspired by my friend Scout, I decided to post my playlist this morning.
I love to wake up early. When Colton has to go to work at some ungodly hour, I always get up with him to see him off.
Being up before the sun rises always makes me feel very clearheaded.
This morning, I've been lounging on the couch working a crossword, browsing pictures of architecture and interior design, and singing along with these songs. I hope you enjoy them too!
Tuesday, September 18, 2012
Good Eats: Chili Time!
I think that humility is a very important trait.
However, one thing I tend to be a little boastful about is my chili recipe.
It is award winning after all...
(See? There I go again.)
I think that everyone should have an easy chili recipe on hand, because it's cheap, it freezes well, and it's an easy way to feed alot of people. Who doesn't love a one pot wonder? Make it ahead if you need to, because the best chili needs to simmer for a coupla hours.
Here's my recipe.
You'll need:
1 lb ground beef
(I actually used 1/2 lb this time - I've gotta stretch my grocery money, baby!)
1 green bell pepper
1 yellow or brown onion
1 can tomato sauce
1 can diced tomatoes
1 can rotel or other brand diced tomatoes with green chiles
1 can black beans
1 can red beans
salt and pepper
2 heaping Tbsp chili powder
1 heaping Tbsp ground cumin
1/2 tsp cayenne (or 1 minced jalepeno or serrano chile)
optional: 1 1/2 cups brewed coffee or 1 tsp cocoa powder

Roughly chop 1 onion and 1 green bell pepper. Mince the fresh hot pepper if using. (I forgot to get one at the store, so I just used ground cayenne!)

Combine with the ground beef and a generous sprinkling of fresh ground pepper and kosher salt in a 4 qt pot, and cook over medium until beef is browned.

While the beef is browning, begin to open up the cans. There are alot of them! I always give myself a wrist cramp with my manual can opener :)
Go ahead and drain and rinse the beans. (Feel free to use other varieties, although I swear by the black beans. They make good chili. Besides, kidney beans freak me out. They're a little big. It's a miracle I eat beans at all. From the time of my birth to about 16 years of age, I ate approximately 10 beans.)

When the beef is evenly browned, add the tomato sauce, diced tomatoes, and rotel. Next, add either a can's worth of water OR brewed coffee. (Don't worry - it doesn't make your chili taste like coffee! It adds a nice depth in flavor.) Finally, mix in the beans.

Spice time! This is where the magic happens.

You want a heck ton of spices in the pot. I mean it, people! Start with 2 heaping tablespoons of chili powder, 1 heaping tablespoon of ground cumin, plenty of black pepper, and 1/2 tsp cayenne if using. If you used water instead of coffee, add 1 tsp cocoa powder. You won't regret it!
Stir, and peer closely at your chili. Can you easily see the spices? If not, add some more! You want them to be visible in the juices.
And that's that! Just bring it to a simmer, slap the lid on, reduce the heat to medium low, and let it simmer for about three hours. Check it once in awhile - you want it to be bubbling, but not going TOO crazy. If you want to simmer it longer, just add extra water as needed so it doesn't burn.

There ya go! Easy-peasy. And check out those fall decorations.

Serve with grated cheddar, sour cream, and fritos!
Friday, September 14, 2012
Fall Friendship Swap
I love sending off packages and receiving them in the mail!
If you do too, a lovely lady named Kristin is holding a Fall Friendship Swap, where you'll be paired up with another blogger to exchange fun autumn-themed package!
Click the link if you want to sign up :)

Wednesday, September 12, 2012
The one thing I don't like about Burbank...
I like Burbank alot. It's fairly quiet, it has some cute little boutiques and a bakery that looks like a train station, and it has lots of trees on the side streets.
But there's one thing I don't like about it.
Milt and Edie's.

Every time I drive down Alameda Boulevard, I get excited, because I think it's a cutesy retro ice cream parlor.
And then I'm very disappointed, because I realize it's a dry cleaners.
(Not that I have anything against dry cleaners. It's just not ice cream, you know?)
Friday, September 7, 2012
Good Eats: My favorite salad dressing!
Does anyone else love Smitten Kitchen?
I'm sure you do.
Everything she makes is SO DREAMY.
Plus, her toddler eschews grilled cheese sandwiches for savory truffle cookies.
(He's a very sophisticated toddler.)
What's not to love?
One of Deb's recipes that I use most often is this easy Napa salad with buttermilk dressing.
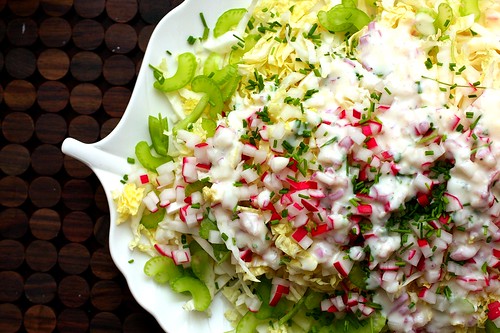
It's just delicious. It's crunchy. It's light. It's tangy!
I've made the original recipe for several parties and get togethers, and it's always a big hit.
Here's the recipe directly from the Smitten Kitchen Blog:
2 tablespoons mayonnaise
2 tablespoons cider vinegar
2 tablespoons minced shallot
1 tablespoon sugar
3 tablespoons finely chopped chives
1 pound Napa cabbage, cored and thinly sliced crosswise (4 cups)
6 radishes, diced
2 celery ribs, thinly sliced diagonally
Whisk together buttermilk, mayonnaise, vinegar, shallot, sugar, 1/2 teaspoon salt, and 1/4 teaspoon pepper in a large bowl until sugar has dissolved, then whisk in chives.
Toss cabbage, radishes, and celery with dressing.
Today, though, I decided to beef up the salad so I could pass it off as lunch. (Colton is sometimes a little put off by what I would call a "Light Lunch". He would call it an "Appetizer".)
I kept the original dressing recipe and poured it over a sort-of cobb salad consisting of:
-Red Leaf Lettuce
-Diced Radishes
-Celery (It was a little limp, so I left it out, but I'll put it in next time!)
-Crumbled crisp bacon
-Diced chicken tenderloin
-Minced fried egg
It was delicious. And I think that it passed (barely!) for lunch :)
Saturday, August 25, 2012
Some things I like, and other things I don't.
Here are some things I like right now.
1. Huge cats
 |
| Image from booksoncats.co.uk |
2. Green tea ice cream
 |
| Image from japanesefood.about.com |
3. 90's board games
4. Chunky cowls
 |
| Image and Cowl from etsy.com/shop/Yokoo |
5. Dirtbiker Malcolm Smith, as seen in On Any Sunday
 |
| Image from sideburnmag.blogspot.com |
6. The Memoirs of a Geisha soundtrack
 |
| Image from imdb.com |
Here are some things I don't like very much.
1. Those robot tests on blogs. I swear I'm not a robot, but I don't know what it says.
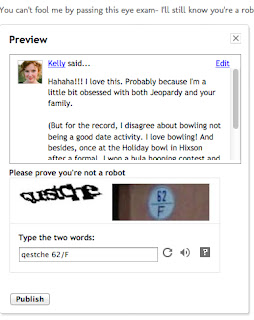 | ||
| Using a fraction in these also doesn't seem fair. |
2. Barbecue potato chips
 |
| Image from fritolay.com |
3. Forgetting to switch the laundry over
 |
| Image from bigfrogmountain.com |
4. Still never being able to get the dairy carton open
 |
| Image from blog.inthewildtesting.com |
5. Silverfish
 | ||
| Image from discoverlife.org |
Wednesday, August 22, 2012
It was an accident.
Have you ever hurt a loved one on accident? I don't mean telling them they look weird in their favorite sweater and hurting their feelings, I mean really hurting them. My mom banged my Dad's head with a frying pan once. My sister April hit her husband in the face and knocked his glasses off while they were playing tennis. April swears I broke her nose with my head when we were kids. (I still don't believe that one.)
I had a pretty clean record regarding Colton, until yesterday.

Do you see the yellow line? That's the Ulnar Nerve, commonly known as the "funny bone". It's the largest nerve in the body unprotected by muscle or bone. When I was in school, I would routinely bonk my elbow on the metal bar of my desk, and shoo-ey. It really hurts. It feels crazy.
When I wash the dishes, I like to have music going in the kitchen. I usually drag a chair from the dining room and set my laptop on it so I can get my groove on while I scrub.
Yesterday, just after I finished with the pots and pans, Colton came in the kitchen to set his plate in the sink. I decided that was an ideal time to move my computer back to the dining room. I picked up the chair and Kablooey!!!
I slammed the corner of the top rail right into his funny bone. Poor thing, he had no clue what was happening. He dropped the plate, yelled "FUUUOOOOOOWWW!!!", (what amazing self control, right?) and stumbled into the living room to hold his elbow. He couldn't feel his fingers for a good five minutes. Later he said he thought his elbow was exploding.
I'm so sorry, sweet husband. It was an accident. Please don't retaliate in like manner :)
I had a pretty clean record regarding Colton, until yesterday.
Do you see the yellow line? That's the Ulnar Nerve, commonly known as the "funny bone". It's the largest nerve in the body unprotected by muscle or bone. When I was in school, I would routinely bonk my elbow on the metal bar of my desk, and shoo-ey. It really hurts. It feels crazy.
When I wash the dishes, I like to have music going in the kitchen. I usually drag a chair from the dining room and set my laptop on it so I can get my groove on while I scrub.
Yesterday, just after I finished with the pots and pans, Colton came in the kitchen to set his plate in the sink. I decided that was an ideal time to move my computer back to the dining room. I picked up the chair and Kablooey!!!
I slammed the corner of the top rail right into his funny bone. Poor thing, he had no clue what was happening. He dropped the plate, yelled "FUUUOOOOOOWWW!!!", (what amazing self control, right?) and stumbled into the living room to hold his elbow. He couldn't feel his fingers for a good five minutes. Later he said he thought his elbow was exploding.
I'm so sorry, sweet husband. It was an accident. Please don't retaliate in like manner :)
Monday, August 20, 2012
New Blog!
Hello, dear friends!
In order to help me stay inspired and dedicated to growing my handmade jewelry business, I've created a new blog! Please become a follower if you're interested - I'll be posting things that inspire me, ranging from fashion and jewelry to movies and music. I'll also give occasional updates about the progress of Whisperwill. I'll keep updating this blog, however, with recipes and personal stories.
(Note the blog design. I spent hours this afternoon trying to figure it out! I'm very proud of myself. It even has a nav bar at the top! Getting fancy over here.)
Friday, August 17, 2012
Lobster Adventures
I was shopping at Ralphs the other day, and in the seafood section I spied a pile of raw lobster tails.
I knew I had to have them.
This was a bit of a risky move, seeing as how they're pretty expensive and I've only had lobster once. I had heard it's very easy to overcook these guys, and I didn't have any clue how to get them open.
But... when I had it that one time, with my husbands family, I knew that lobster and I would probably be lifelong friends.
As it turns out, the tails aren't hard to prepare!
Here's how I did it, if you're feeling risky too.
I decided to serve them with a simple pasta dish and an arugula salad.
I used Giada's recipe for "Lobster Tails with Clarified Butter". I trust her :)

If there's a dish I feel a little uncomfortable with, I like to get everything else ready so I can focus on the tricky one near the end. I started by putting my pasta water on to boil with a small hand of kosher salt.

Then I got out to bowls for my lemon vinaigrette and the clarified butter for the lobster.

In one bowl I zested the lemons, into which I would pour the clarified butter. In the other, I juiced the lemons for the salad dressing.

I melted two sticks of unsalted butter over low heat, then let the butter sit for five minutes in a glass measuring cup and scraped off the foam on the surface. I poured the clarified butter over the lemon zest. (If you do this, make sure not to pour off the solids in the bottom of the measuring cup. You only want the clear, golden stuff! I got a little too crazy with my pouring and ended up with a little bit of solids in our butter. Whoops!)

While I was waiting for the butter to melt, I whisked about a tablespoon of dijon mustard with the lemon juice.

Then I slowly whisked in olive oil until it made an emulsion, and added salt, pepper, and honey for flavor. I stuck it in the fridge to chill until needed.

Time for the tails! I was excited that they came wrapped in paper. (If we're being honest here - I usually just buy pre-packaged meat instead of getting the butcher to cut it.)

The tops are pretty, but I don't like to look underneath. It freaks me out a little. Plus, the bottoms have little pokey things along the edge. Ouch!

To prepare them for cooking, I cut a line through the middle of the top shell and pried it open. The cutting was definitely the hardest part of preparation. I did a better job with the one on the left. Then I stuck skewers through the meat near the bottom so the tails wouldn't curl while cooking.

I drizzled them with the clarified butter and wrapped them up in foil, cooking them at 400 degrees. I checked them every few minutes, waiting for the shells to begin to redden and the meat to become more opaque. Once the looked almost done, I unwrapped them and stuck them under the broiler for just a minute or two. I set the remainder of the butter on the table for dipping.

While the lobsters were cooking, I made a quick alfredo sauce and threw the pasta in to boil.

Here's the whole spread!

I meant to take a closeup of my lobster tail, but I accidentally ate it all first. Sorry :)
Thursday, August 16, 2012


Subscribe to:
Posts (Atom)